Odoo Project Module (Timesheet)
A timesheet, often known as a time keeping system, is an important part of project management. We can utilize the Odoo platform to accurately track the amount of time people spend on various projects or tasks.
Timesheet is integrated with the Project Module, so when we start a project, we can create a schedule or manage a timesheet for it to ensure that the tasks billed in the project are completed efficiently. Odoo Timesheet can be used to keep track of tasks and projects as well as analyze completion rates. Many companies work on various projects based on the project's budget.
By monitoring employee working hours and expenses, timesheets will make it easier to manage and track the budget.
Odoo relieves you of the chore of certifying the timesheet and makes it easier to update it properly.
We must enable the Timesheet option if we want to use Odoo Timesheet in the Project module.
The Configuration menu is where you may do this. We must enable the timesheet in the Settings section of the Configuration. We can use the timesheet after enabling Time management in the settings.
Create a new project that includes a timesheet.
Now we can see how to build a new project and use the timesheet support for operations management.
Odoo Project Module Timesheet Integration
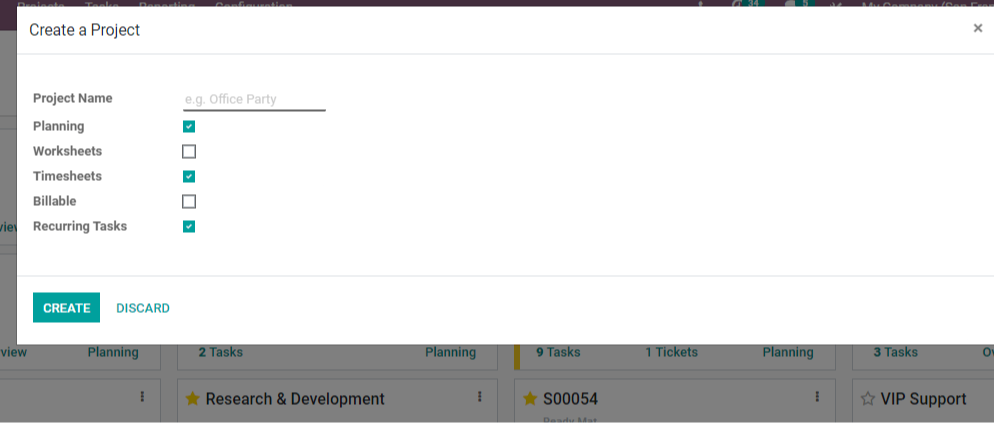
When we select Create Project, a pop-up box appears with options for entering the project name. Planning, spreadsheets, timesheets, billable and recurring tasks can all be enabled. Only needed settings must be enabled in this case. We can enable the Timesheet option and click the Create button while checking the Timesheet connection with Project.
After hitting the create button, we are taken to a page where we must enter the various stages of project management.
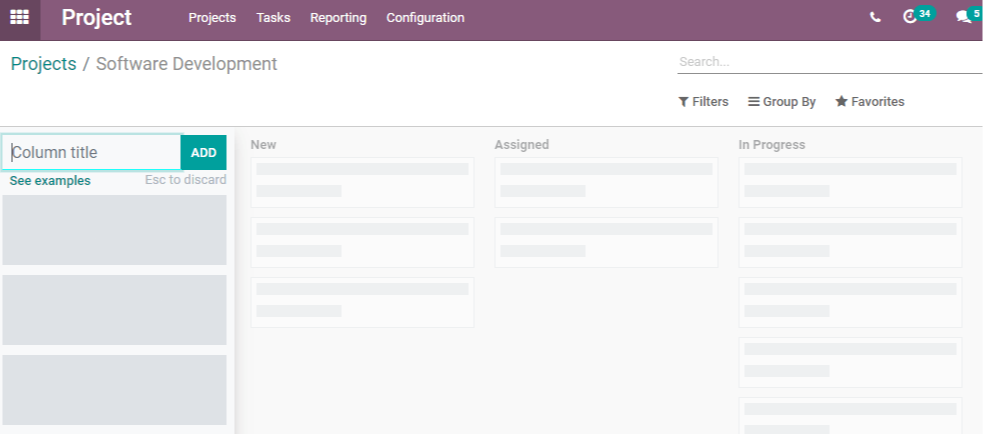
We can add several stages to the work and organize the duties in this way. We can now return to our projects and double-check them.
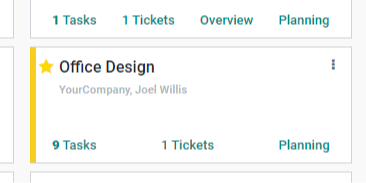
We can have a look at some Office design projects. This project consists of nine tasks and one ticket. Using the three dots, we can make adjustments to this project. Then we have the option to edit, and we can see if the Billable option is enabled.
Odoo Project Module Timesheet Integration
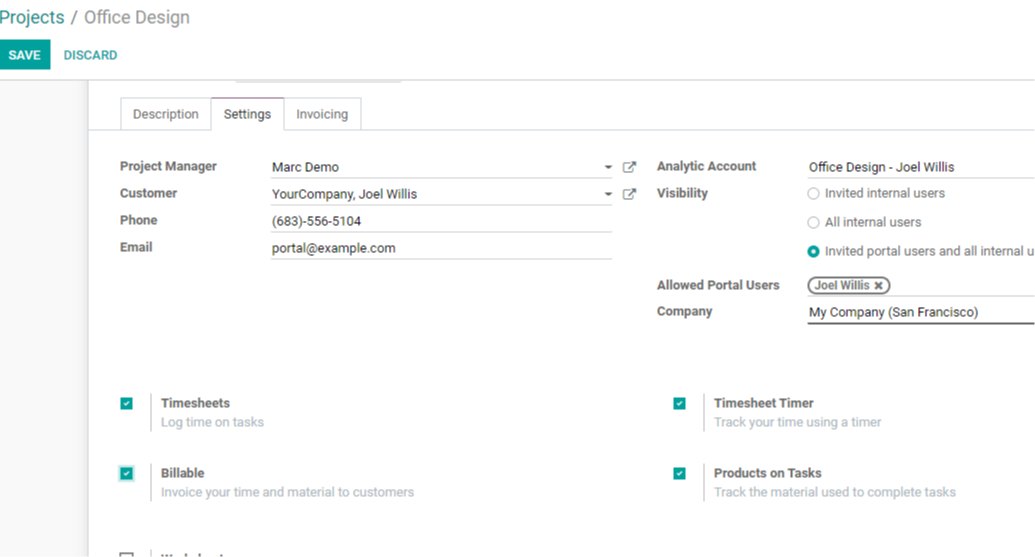
We can have a look at some Office design projects. This project consists of nine tasks and one ticket. Using the three dots, we can make adjustments to this project. Then we have the option to edit, and we can see if the Billable option is enabled.
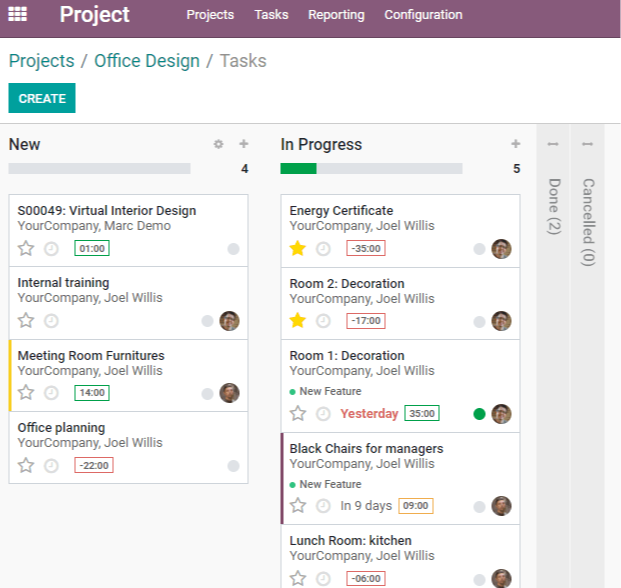
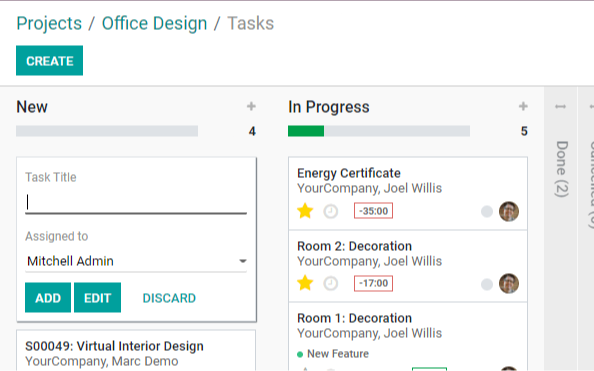
We can make a new task here. After we've created the task, we can assign it to someone.
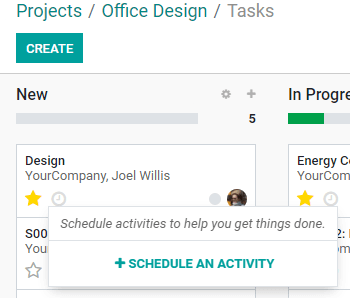
We can assign a importance to the job and schedule its completion after it has been established.
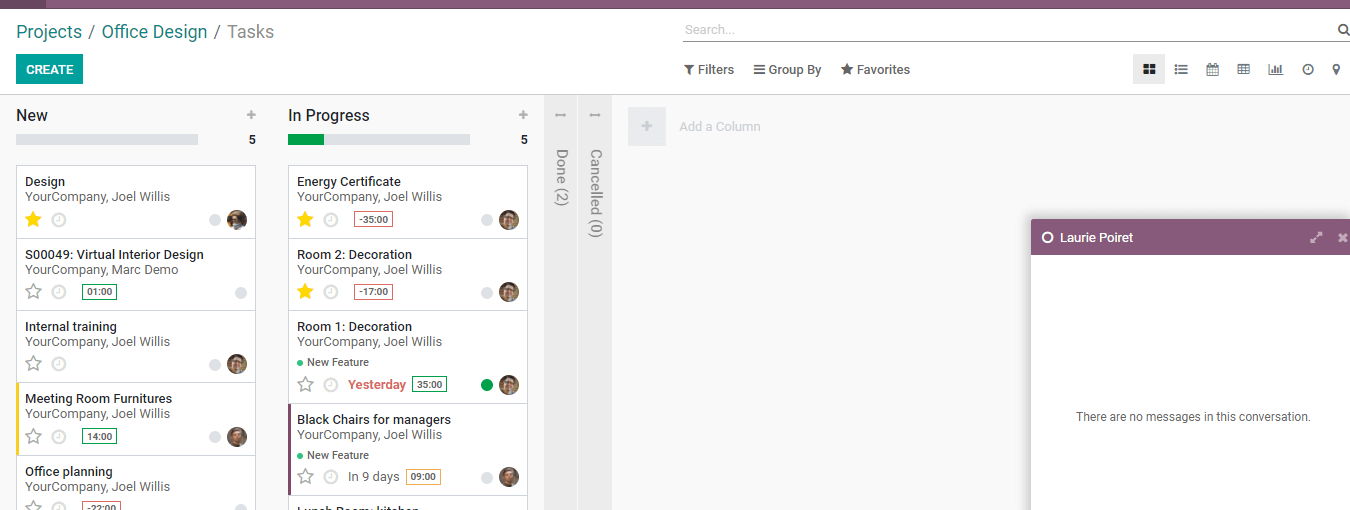
We can start a communication with the individual who has been assigned the assignment by clicking on their image. After that, we'll receive a chat box. By opening the task, we can inspect it.
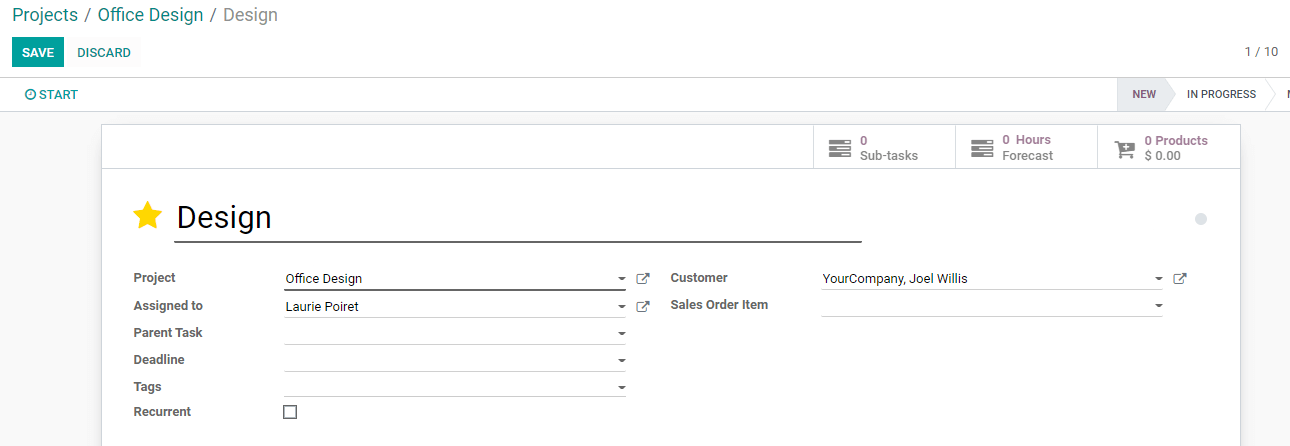
We can make changes to the task and add customer information here. We can also include parent tasks, deadlines, and tags in this section. We can also choose which things to include in the sale order.
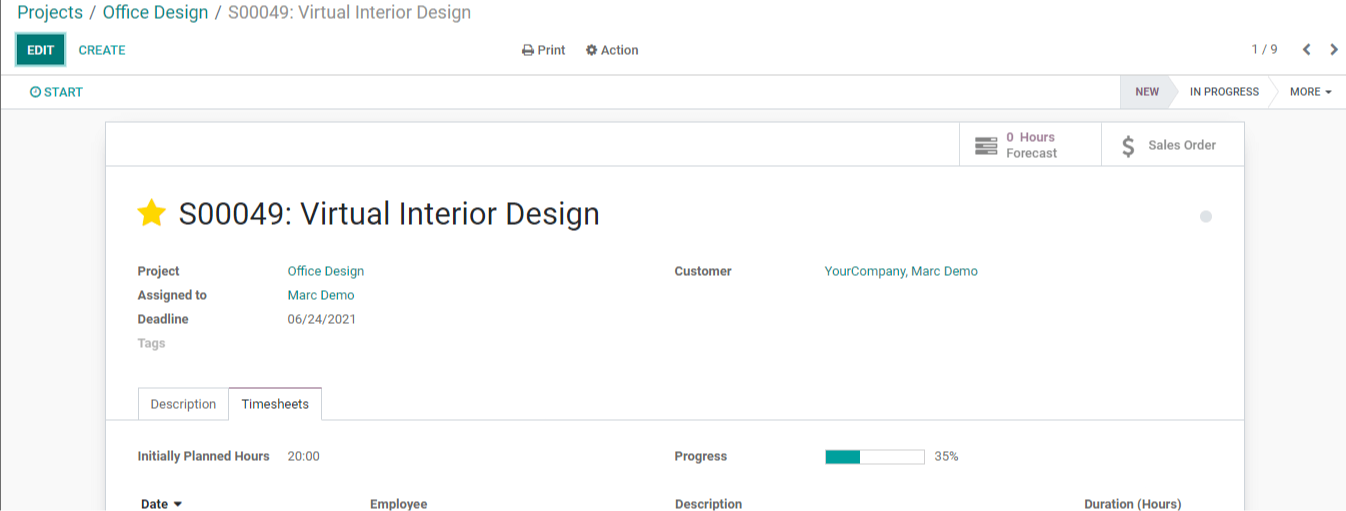
The Timesheets tab can also be found here.


On the top, there are two more possibilities. Hours and Progress are initially intended. Whenever we start a project, we estimate the total number of hours it will take to complete it. The progress will be automatically displayed in % once the employees' labor hours have been added.
This will assist us in the creation of project reports. We may now save this activity and proceed to build a sales order.
Projects

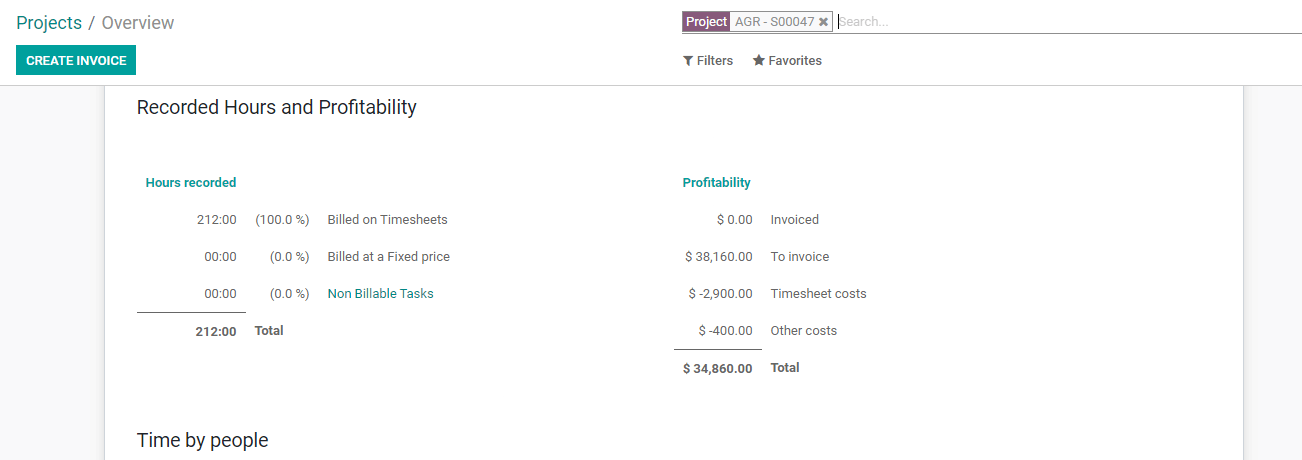
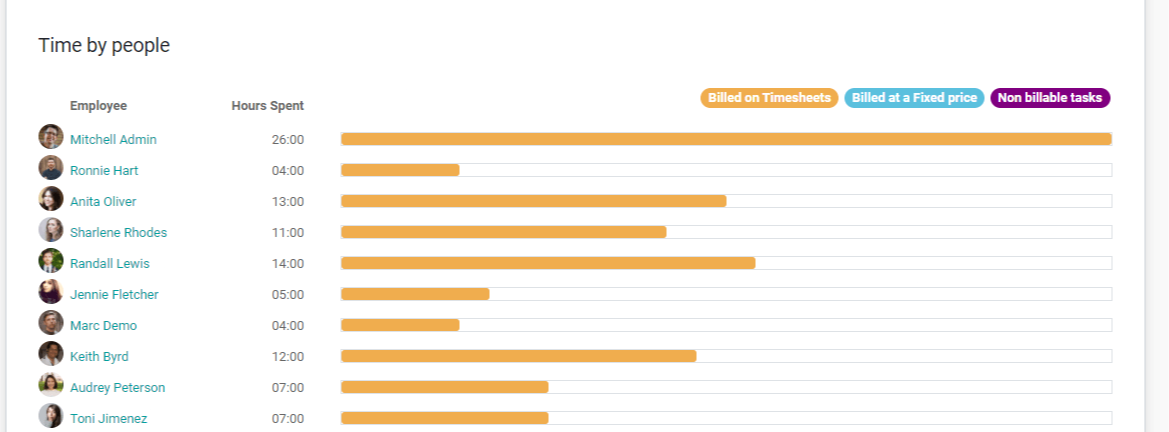
We can see that there are two tasks under one project by looking at this overview. On this page, we may also locate late tasks, over time details, and work hours.
The recorder hours are listed as 212 hours. The billable and non-billed hours can then be found.
We can identify billed amount, amount to be invoiced, timesheet cost, and other charges below profitability. Here we can also get information on different people's lives, including their times. The timesheets and planning details can then be accessed from this overview.
Recorded hours and profitability can be seen here.
Reports
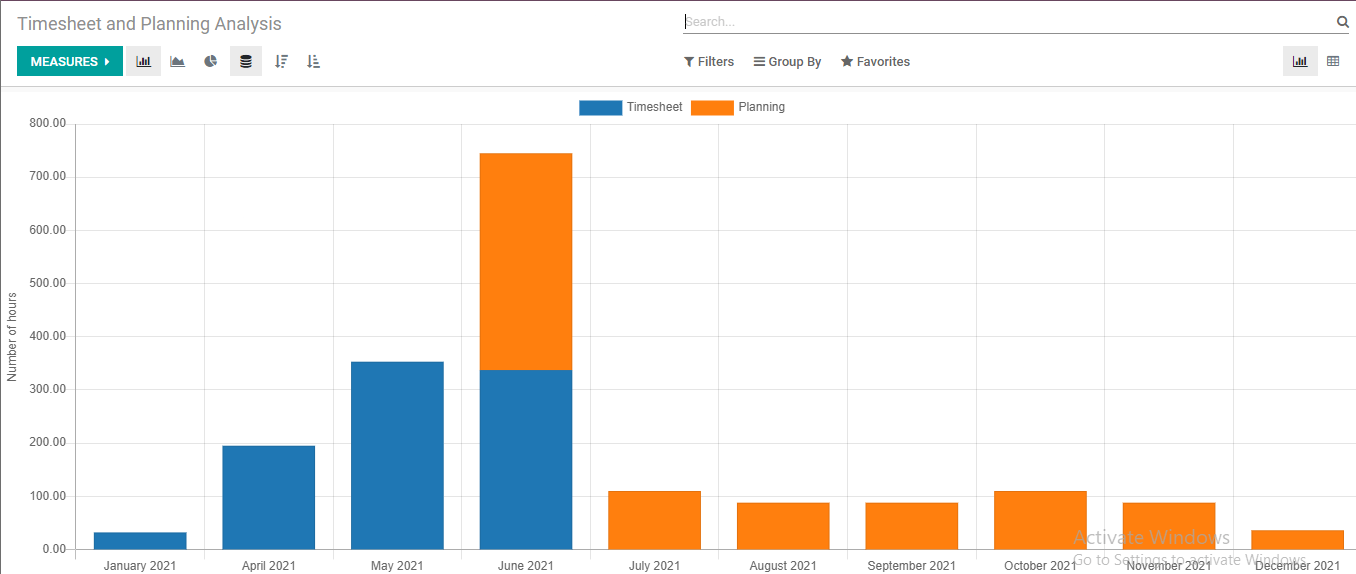
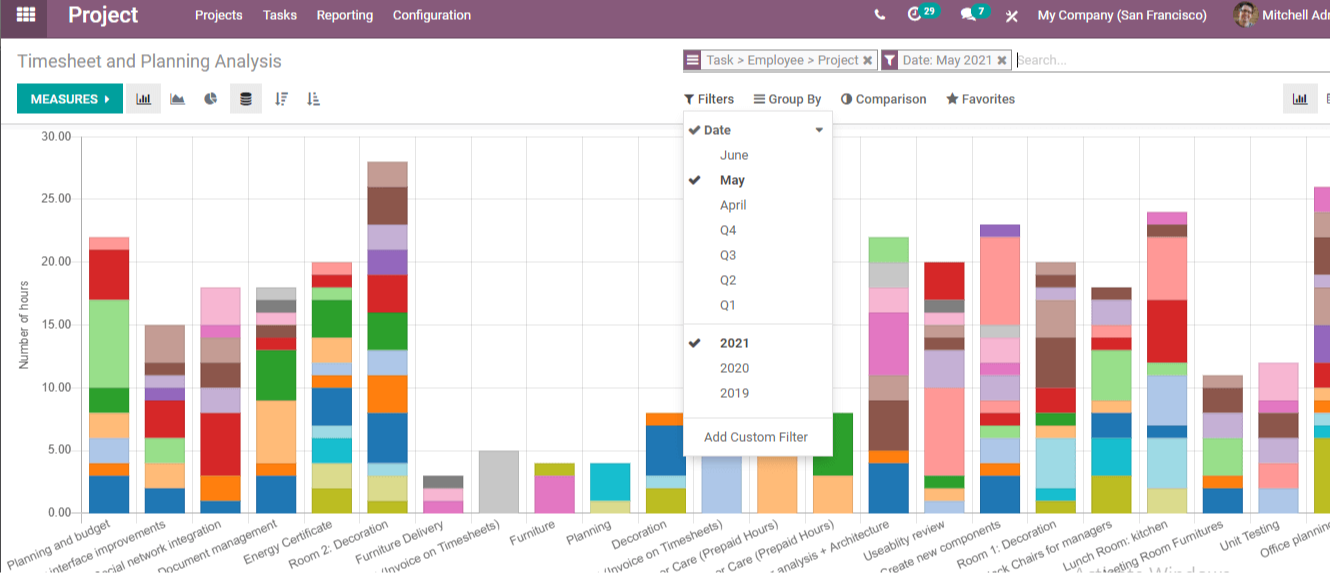
Reporting is a vital tool that will allow us to evaluate staff effectiveness and productivity.
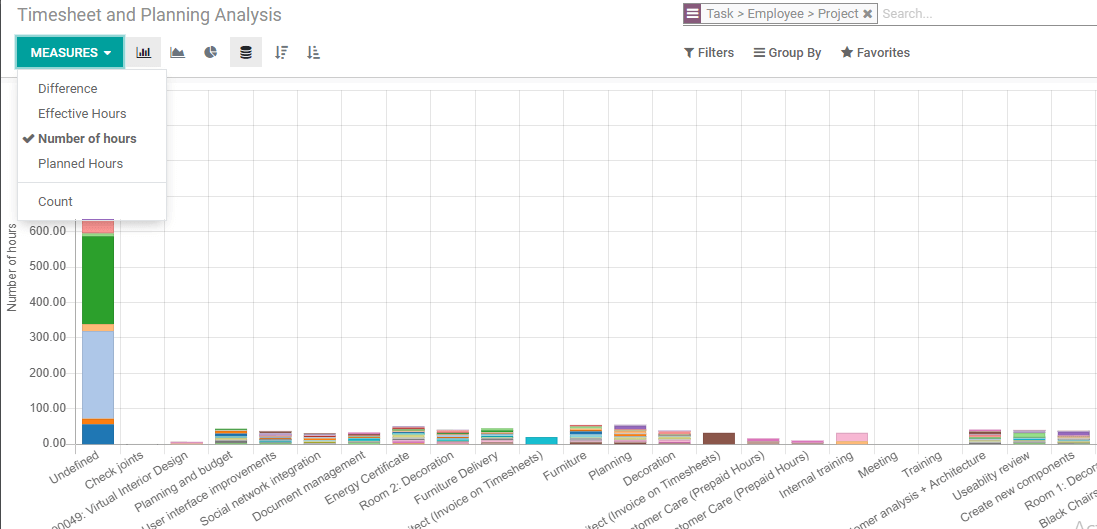
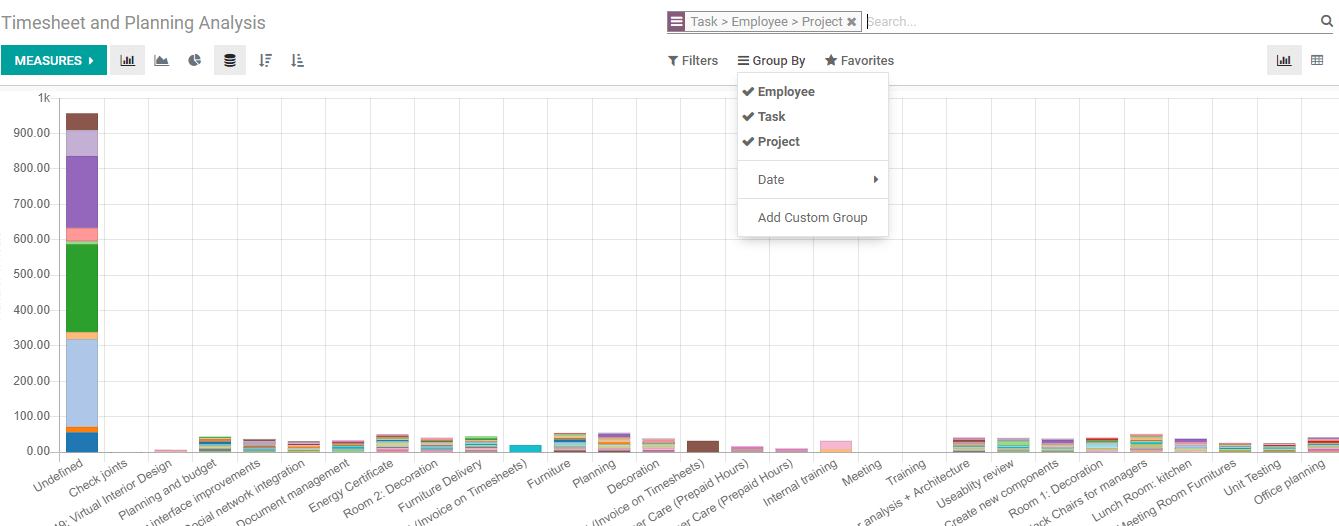
The performance of employees in various months is depicted in the figure above. This is accomplished through the use of timesheet representations.
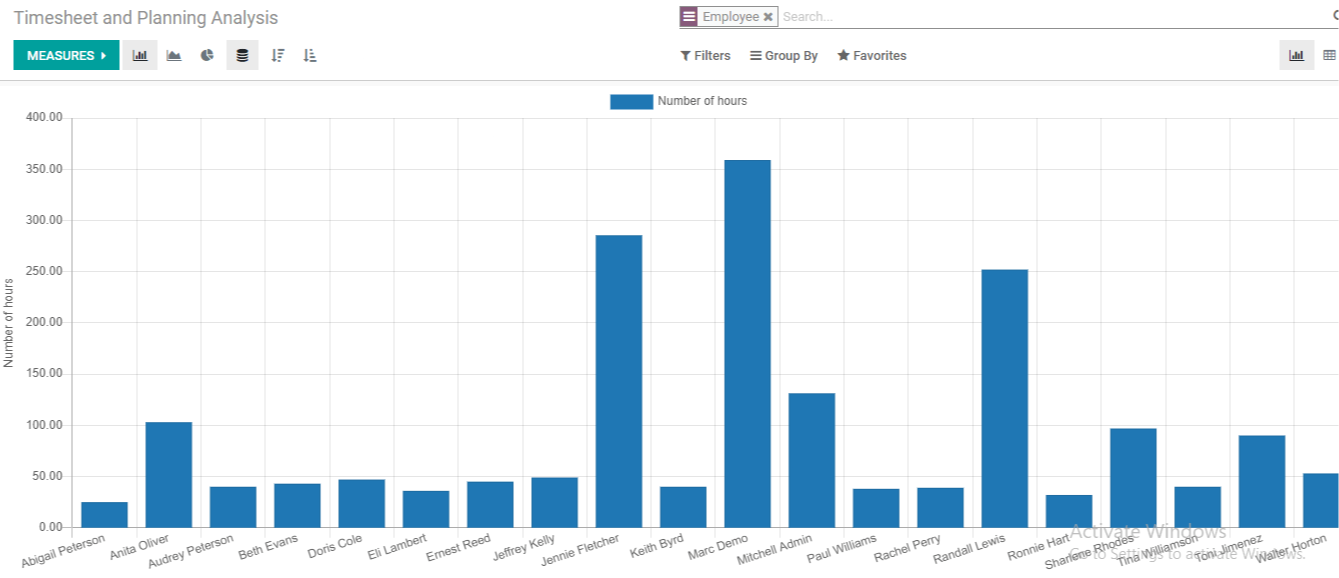
We can categorize the reports based on many parameters. The above is a report on the various employees' performance. Their task management and support system are used to evaluate their performance.
We can see from this image that Marc Demo was the most productive employee.
We can categorize it by employee, task, or project. We can also take care of the reporting metrics. Different measurements might be used, such as effective hours, number of hours, and scheduled hours. Filters can also be used to filter employee performance for a specific time period. These are the main benefits of integrating Odoo Timesheet with the Project module
In a
nutshell, Odoo Timesheet is something that cannot be overlooked when it
comes to project management. It helps not just in staff administration
but also in project analysis and the generation of sales orders and
invoicing. Because Odoo Timesheet is such a useful tool, every service-based firm can benefit from it.


